If you’ve ever wondered about your dog’s breed mix, possible health predispositions, or ancestral roots, a dog DNA test is the perfect solution. To help you get reliable results, here’s a detailed, step-by-step guide on using a dog DNA sampling kit effectively.
What’s Inside Your Dog DNA Sampling Kit?
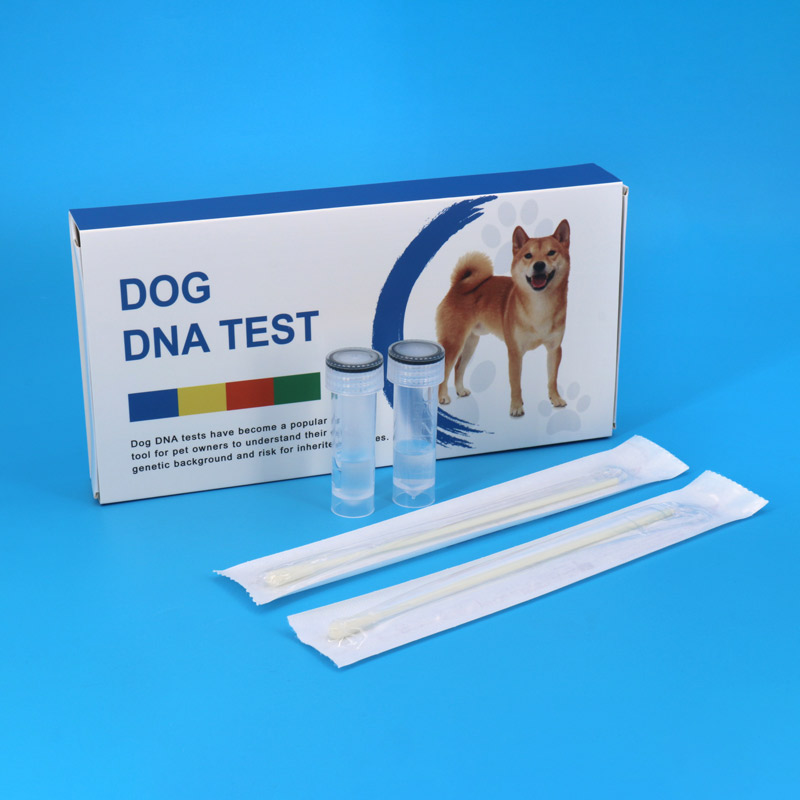
When you open your kit, you’ll find several essential components:
- 2 flocked swabs: These are designed to gather DNA samples from your dog’s mouth.
- 4 barcodes: These labels are crucial for identifying and tracking your samples throughout the process.
- 2 sample storage tubes: They keep the collected DNA safe and secure.
- 1 return bag: It’s used to send your samples back to the testing laboratory.
Warm reminder: You can purchase high-quality dog DNA sampling kits from MEIDIKE GENE by visiting their website: https://www.medicoswab.com/dog-dna-test-kit/
Before you start, take a moment to check that all the items are included. Also, be careful not to touch the tips of the swabs, as this can lead to contamination and affect your results.
Getting Ready to Collect the DNA Sample
- Timing is key: It’s best to wait at least 30 minutes after your dog has eaten or drunk anything. This helps avoid food particles or liquids interfering with the sample.
- Keep things calm: A relaxed dog makes the swabbing process much easier. Try to create a quiet, stress-free environment for your pup.
- Label first: Before you start collecting the sample, attach one barcode to each of the storage tubes. This ensures there’s no confusion later on.
Collecting the DNA Sample
Using the flocked swabs from the kit, follow these simple steps to collect your dog’s DNA:
- Hold the swab stick firmly but gently, and insert it into the side of your dog’s mouth.
- Rub the swab against the inside of your dog’s cheek for 30 to 60 seconds. This gives enough time to collect an adequate amount of saliva and cheek cells, which contain the DNA.
- Use the second swab to repeat the process. Having a backup sample is always a good idea in case something goes wrong with the first one.
Remember, throughout this process, never touch the tip of the swab. Keeping it clean and free from contamination is vital for accurate results.
Storing the Sample in the Tubes
- Insert the swabs: Once the swabs are dry, place each one into a labeled storage tube.
- Secure the lid: Tighten the lid of each tube properly to prevent any leaks that could damage the sample.
- Double-check barcodes: If the brand requires it, make sure the barcodes on the tubes match the ones you used during registration.
Packing and Returning the Samples
Put the labeled sample storage tubes into the return bag that came with your kit. Seal the bag tightly to keep everything secure, then follow the specific mailing instructions provided to send the samples back to the lab.
What Happens After You Send the Samples?
Once the lab receives your samples, here’s what happens next:
- They will extract the DNA from the swabs.
- The lab will analyze the DNA to determine your dog’s breed composition, check for health markers, or identify specific traits, depending on the type of test you purchased.
- You’ll receive the results via email within 2 to 6 weeks.
Tips for a Successful DNA Test
- To prevent cross-contamination, handle only one swab at a time.
- If the kit requires it, make sure to register your kit online before mailing it back. This helps the lab process your sample more efficiently.
- If your samples get lost or damaged, don’t hesitate to contact the customer support team for assistance.


